

有用的小知识 Ver 1.0.0
获取屏幕宽度
js
const screenWidth = document.documentElement.clientWidth || document.body.clientWidthjavascript
// 获取本地缓存配置
let cache = {}
try {
  cache = JSON.parse(localStorage.getItem(setting.themeStoreName) || '{}')
} catch (e) {
  console.error(e)
}一.截屏工具
js
https://pc.qq.com/detail/8/detail_22868.html二.如何看跨域了

git
git 常用命令
一. git 命令初识
从 git 版本库的初始化,以下两种:
git clone
二、 Git 常用命令
1) 远程仓库相关命令
检查仓库: $ git clone git://github.com/jquery/jquery.git
查看远程仓库: $ git remote -v
添加远程仓库: $ git remote add [name] [url]
删除远程仓库: $ git remote rm [name]
修改远程仓库: $ git remote set-url --push [name] [newUrl]
拉取远程仓库: $ git pull [remoteName] [localBranchName]
推送远程仓库: $ git push [remoteName] [localBranchName]
*如果想把本地的某个分支 test 提交到远程仓库,并作为远程仓库的 master 分支,或者作为另外一个名叫 test 的分支,如下:
git push origin test:master //提交本地 test 分支作为远程的 master 分支
git push origin test:test //提交本地 test 分支作为远程的分支
2)分支(branch)操作相关命令
查看本地分支: git branch
查看远程分支: git branch -r
创建本地分支: git branch[name] ----注意新分支创建后不会自动切换为当前分支
切换分支:$ git checkout [name]
创建新分支并立即切换到新分支:$ git checkout -b [name]
删除分支:$ git branch -d [name] ---- -d 选项只能删除已经参与了合并的分支,对于未有合并的分支是无法删除的。如果想强制删除一个分支,可以使用-D 选项
合并分支:$ git merge [name] ----将名称为[name]的分支与当前分支合并
创建远程分支(本地分支 push 到远程):$ git push origin [name]
删除远程分支:gitpushorigin:heads/[name]或 gitpushorigin:heads/[name]或 gitpush origin :[name]
*创建空的分支:(执行命令之前记得先提交你当前分支的修改,否则会被强制删干净没得后悔)
$git symbolic-ref HEAD refs/heads/[name]
$rm .git/index
$git clean -fdx
3)版本(tag)操作相关命令
查看版本:$ git tag
创建版本:$ git tag [name]
删除版本:$ git tag -d [name]
查看远程版本:$ git tag -r
创建远程版本(本地版本 push 到远程):$ git push origin [name]
删除远程版本:$ git push origin :refs/tags/[name]
合并远程仓库的 tag 到本地:$ git pull origin --tags
上传本地 tag 到远程仓库:$ git push origin --tags
创建带注释的 tag:$ git tag -a [name] -m 'yourMessage'
4) 子模块(submodule)相关操作命令
添加子模块:$ git submodule add [url] [path]
如:$git submodule add git://github.com/soberh/ui-libs.git src/main/webapp/ui-libs
初始化子模块:$ git submodule init ----只在首次检出仓库时运行一次就行
更新子模块:$ git submodule update ----每次更新或切换分支后都需要运行一下
删除子模块:(分 4 步走哦)
$ git rm --cached [path]
编辑“.gitmodules”文件,将子模块的相关配置节点删除掉
编辑“ .git/config”文件,将子模块的相关配置节点删除掉
手动删除子模块残留的目录
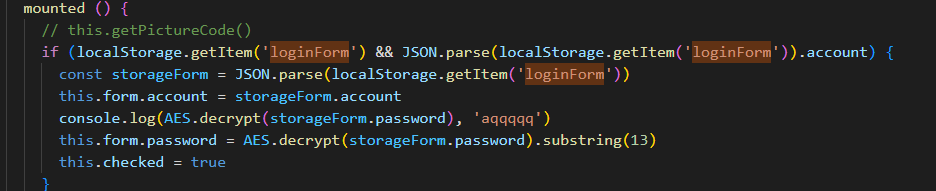
三.解密函数 AES.decrypt() //加密函数 AES.encrypt()
js
AES.decrypt()
//举例
if (localStorage.getItem('loginForm') && JSON.parse(localStorage.getItem('loginForm')).account) {
  const storageForm = JSON.parse(localStorage.getItem('loginForm'))
  this.form.account = storageForm.account
  console.log(AES.decrypt(storageForm.password), 'aqqqqq')
  this.form.password = AES.decrypt(storageForm.password).substring(13)
  this.checked = true
}
js
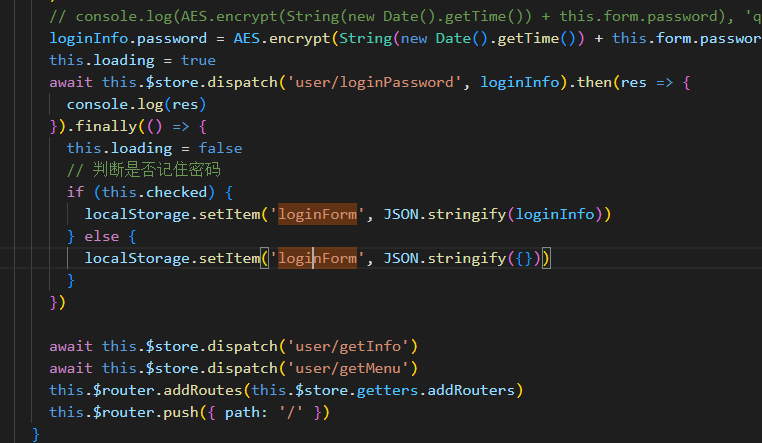
loginInfo.password = AES.encrypt(String(new Date().getTime()) + this.form.password)四.表单验证 validate()方法
如果表单选项较多时,就可用组件化表单验证,利用 validate 可以满足需求,实现快速开发;
js
 rules: {
        managePerson:[
          {
            required: true,
            message: "管理责任人不能为空",
            trigger: "blur",
          },
        ],
		idNumber: [
          {
            pattern:
              /^[1-9]\d{5}(18|19|20)\d{2}((0[1-9])|(1[0-2]))(([0-2][1-9])|10|20|30|31)\d{3}[0-9Xx]$/,
            message: "请输入正确的身份证号",
            trigger: "blur",
          },
        ]
     .....
}在表头加入
js
<el-form
:class="{ border: unonber, 'red-sta': unonber }"
ref="form"//加上ref
:model="form"
//加入rules
:rules="rules"
label-width="120px"
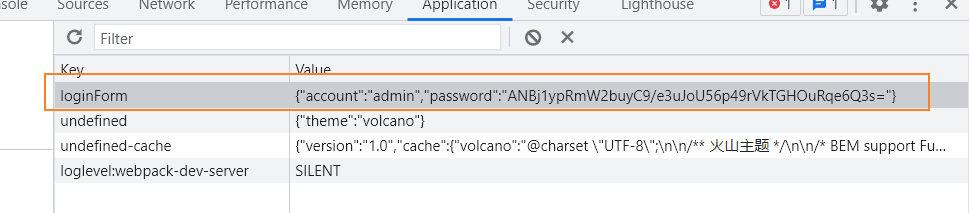
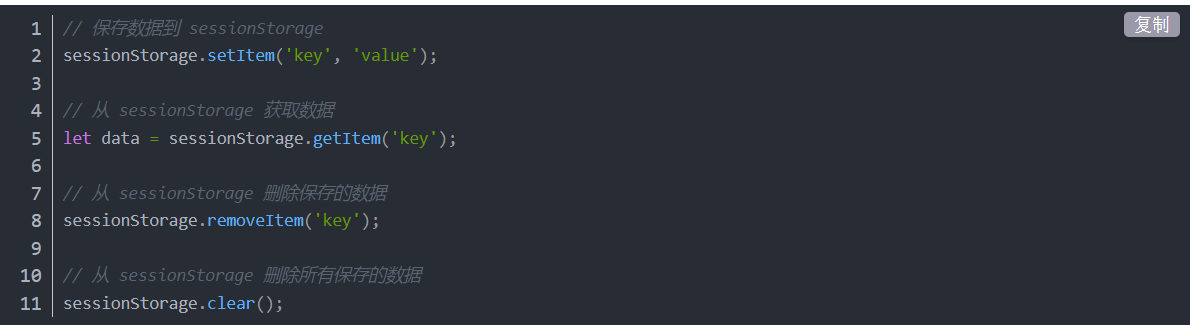
>五.localStorage 的使用
应用场景:常用于长期登录(+判断用户是否已登录),适合长期保存在本地的数据
语法:window. localStorage 返回值:一个存储对象 增加数据:localStorage. setItem(“key”,value); 读取数据:localStorage. getItem(“key”); 删除数据:localStorage. removeItem(“key”); 删除所有数据:localStorage. clear( );
localStorage.getItem(key): 获取指定 key 本地存储的值
localStorage.setItem(key,value): 将 value 存储到 key 字段
六.JSON 常用操作
1.JSON 对象和 JSON 字符串的转换
在数据传输过程中,JSON 是以字符串的形式传递的,而 JS 操作的是JSON对象,所以,JSON 对象和 JSON 字符串之间的相互转换是关键
JSON 字符串:外面有双引号
js
var jsonStr = '{"name":"Liza", "password":"123"}'JSON 对象:
js
var jsonObj = { name: 'Liza', password: '123' }JSON 字符串转化 JSON 对象:
js
var jsonObject = jQuery.parseJSON(jsonstr)
console.log(jsonObject) //{name:"Liza",password:"123"}JavaScript 对象转化 JSON 字符串
js
var jsonstr = JSON.stringify(jsonObject)
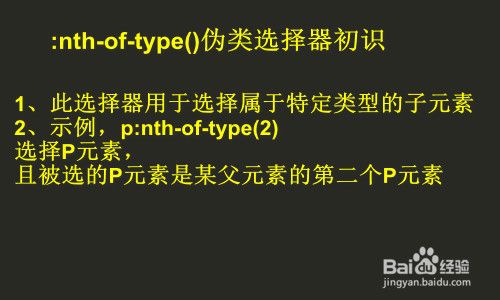
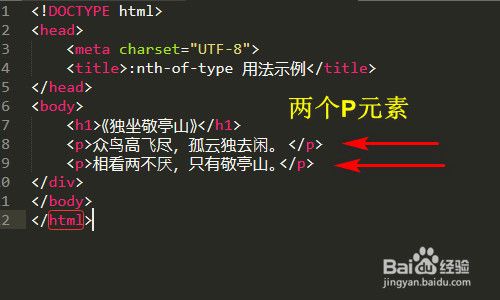
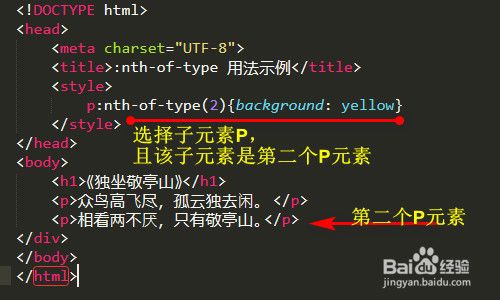
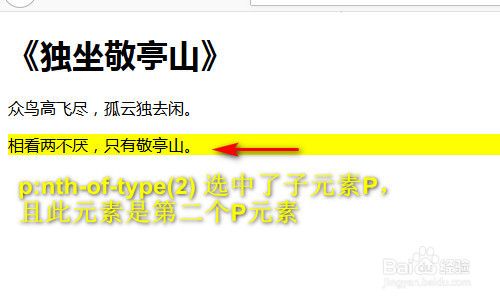
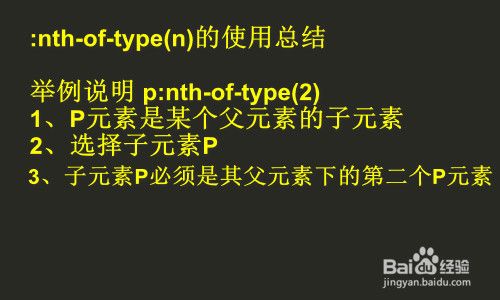
console.log(jsonstr) //{"name":"Liza", "password":"123"}七.nth-of-type() 详解
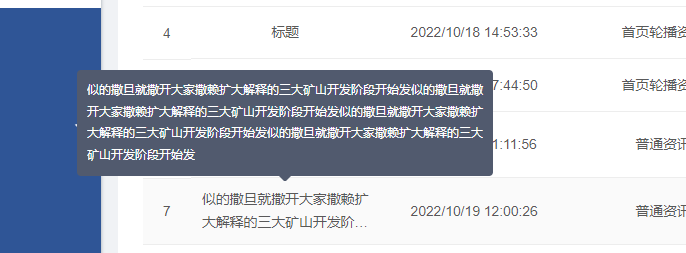
八.el-tooltip 中显示二行省略
vue
##html
<el-table-column prop="title" align="center" label="新闻标题">
            <template #default="{row}">
              <el-tooltip :content="row.title" placement="top">
                <p class="descStyle">{{row.title}}</p>
              </el-tooltip>
            </template>
          </el-table-column>
</el-table-column>

<style>
 //写在全局样式里面golaable.less
.descStyle {
  display: -webkit-box;
  overflow: hidden;
  white-space: normal !important;
  text-overflow: ellipsis;
  word-wrap: break-word;
  -webkit-line-clamp: 2;//控制几行显示省略
  -webkit-box-orient: vertical;
}
//控制弹出框的宽度同样写在全局样式里面
.el-tooltip__popper {
  max-width: 400px;
  line-height: 180%;
}
</style>效果:
九.Lodash JavaScript 工具库
测试环境:
vue
<script src="lodash.js"></script>通过 npm:
vue
npm i -g npm npm i --save lodash十.Element-ui 中 table 默认选中 toggleRowSelection
通过了解,结合 vue 的特殊属性 ref 引用到 DOM 元素上,再执行 dom 上的toggleRowSelection方法
toggleRowSelection(row,selected)接受两个接受两个参数,row 传递被勾选行的数据,selected 设置是否选中
注意:调用 toggleRowSelection 这个方法 需要获取真实 dom 所以需要注册 ref 来引用它
十一.elementUI 文件上传 upload
js
<el-form-item label="上传图片:" prop="imagePathList">
                <el-upload
                  class="upload-demo"
                  :action="$setting.fileUrlPrefix"  //必选参数,上传地址$setting.fileUrlPrefix为 fileUrlPrefix: process.env.VUE_APP_FILE_URL, // 服务器文件上传前缀
                  :on-preview="handlePictureCardPreview"
                  :on-remove="handleOtherUrlsRemove"
                  :on-success="handleOtherUrlsSuccess"
                  :before-upload="handleOtherUrlsBefore"
                  :file-list="form_two.imagePathList"
                  multiple
                >
                  <el-button size="small" type="primary">点击上传</el-button>
                  <div slot="tip" class="el-upload__tip" style="color: #555;">单张图片不超过100M,支持jpg格式。</div>
                </el-upload>
              </el-form-item>
//预览图片
  <el-dialog :visible.sync="dialogVisible">
      <img width="100%" :src="dialogImageUrl" alt="" />
    </el-dialog>

data:{
  dialogVisible: false,
imgUrl: process.env.VUE_APP_RES_URL,

methods:{
  handleOtherUrlsRemove(file, fileList) {
      this.form_two.imagePathList = fileList;
    },
    // 上传成功
    handleOtherUrlsSuccess(response, file, fileList) {
      if (response) {
        // this.$setting.fileUrlResPrefix +
        fileList[fileList.length - 1].url = response.path;
        fileList[fileList.length - 1].name = response.alias;
      }
      this.form_two.imagePathList = fileList;
    },
    // 文件上传校验
    handleOtherUrlsBefore(file) {
      console.log(file,'我是file')
      // 取文件后缀
      const fileSuffix = file.name
        .substring(file.name.lastIndexOf(".") + 1)
        .toLowerCase();
      const whiteList = [ "jpg" ,"png","jpeg","gif"]; // 允许的文件后缀"doc", "docx",
      if (whiteList.indexOf(fileSuffix) === -1) {
        // 判断是否包含后缀
        this.$message.error("上传文件只能是.jpg .jpeg .gif格式!"); //.doc .docx
        return false;
      }

      //1MB=1024*1024(1MB=1024KB 1KB=1024MB)
      const maxSize = 100 * 1024 * 1024;
      if (file.size > maxSize) {
        this.$message.error("单个文件不能超过100MB!");
        return false;
      }
    },
    // 图片校验
    // handleImgBefore(file) {
    //   console.log(file);
    // },
    // 图片上传成功
    handleImgSuccess(response, file, fileList) {
      console.log(file, response, fileList);
    },
    // 图片预览
    handlePictureCardPreview(file) {
      this.dialogImageUrl =this.$setting.fileUrlResPrefix + file.url;
      this.dialogVisible = true;
    },
}十二.css3 动画
语法
js
   @keyframes 动画名称 {
       0% {
           width: 100px;
       }
       100% {
           width: 200px
       }
}调用动画
js
   div {
   	/* 调用动画 */
       animation-name: 动画名称;
    	/* 持续时间 */
    	animation-duration: 持续时间;
}十三.文本超出隐藏和省略
js
white-space:nowrap; 是禁止换行。
overflow:hidden; 超出容器隐藏,不然会撑破容器。
text-overflow:ellipsis; 让多出的内容以省略号...来表达。十四.请求
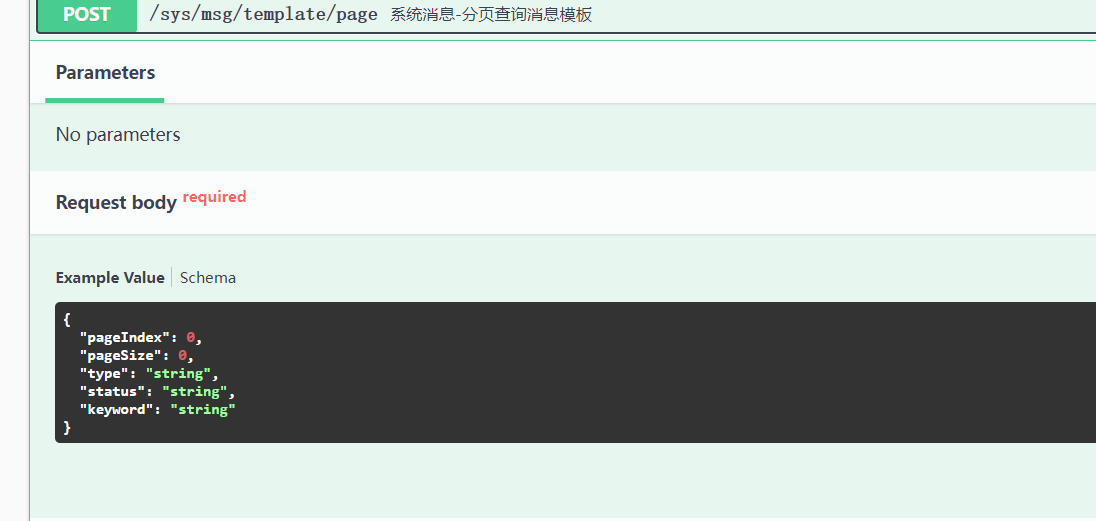
看见 request body 时 用 data
其余用 params
十五.slot 插槽
1、什么是插槽
VUE 官方文档的解释:
Vue 实现了一套内容分发的 API,将 <slot> 元素作为承载分发内容的出口。
个人理解:
插槽实质是对子组件的扩展,通过<slot>插槽向子组件内部指定位置传递内容。
或者这么说:
<slot> 的出现是为了父组件可以堂而皇之地在子组件中加入内容。
打个比方:
有句话叫一个萝卜一个坑。父组件想要在子组件中种萝卜,需要在子组件中挖个坑, <slot> 就是一个【萝卜坑】。父组件想要给子组件添加的内容就是【萝卜】。
由此可见,萝卜种不种,种什么萝卜由父组件控制;萝卜坑在哪,由子组件控制。 换言之 ——
插槽显不显示、怎样显示是由父组件来控制的,而插槽在哪里显示就由子组件来进行控制。
举个栗子,在 Father 父组件内部使用名为 Child 的子组件,向子组件的内部的“指定位置”传递一些内容,你可以这么写:
html
<!-- 这是子组件-->
<div class="child">
  <h2>Child的标题</h2>
  <slot>我是一个萝卜坑</slot>
</div>html
<!-- 这是父组件-->
<div class="father">
  <h1>Father的标题</h1>
  <Child>我是个萝卜~</Child>
</div>Father 的标题 Child 的标题 我是个萝卜~
看到没,是不是就像父组件的萝卜种到了子组件的坑里?
看到这里不禁发出灵魂一问:这不就是父组件给子组件传了个值吗?那和 props 有啥区别?
2、与 props 的区别
通过 props 属性,父组件只能向子组件传递属性、方法
html
<template>
  <div>
    <h1>我是A</h1>
    <child :to-child-data="parentData" :to-child-fun="parentFun"></child>
  </div>
</template>
<script>
  import child from './B.vue'
  export default {
    name: 'A',
    components: {
      child,
    },
    data() {
      return {
        say: '',
        parentData: 'hello',
      }
    },

    methods: {
      parentFun(val) {
        //自定义的函数 val是子组件给的参数
        this.say = val //献给data一份问候~
        console.log(val, ' from child') //看看参数有没有值
        console.log(this.say, ' from parent') //看看能不能给父组件的data传进去
      },
    },
  }
</script>html
<template>
  <div>
    <h2>我是B</h2>
    <el-button @click="childClick">子组件调用父组件的props方法</el-button>
  </div>
</template>
<script>
  export default {
    name: 'B',
    data() {
      return {}
    },
    props: {
      toChildFun: {
        type: Function, //参数类型:函数
        required: true, //是否必填:是
      },
      toChildData: {
        type: String, //参数类型:String
        default: '', //默认值
      },
    },
    methods: {
      childClick(event) {
        this.$props.toChildFun('这是来自子组件的问候~~') //调用Props传来的方法,并送他一个参数~~
        // this.toChildFun('这是来自子组件的问候~~'); //跟上面一个效果
      },
    },
  }
</script>
而插槽还可以传递带标签的内容、甚至是组件:
html
<!-- 这是父组件哦-->
<div class="father">
  <h1>Father的标题</h1>
  <Child>
    {{username}}
    <!-- 参数-->
    <button>我是一个按钮</button>
    <!-- 带标签的内容-->
    <Child2></Child2>
    <!-- 组件-->
  </Child>
</div>3、插槽的使用
(1)匿名插槽(又叫单个插槽、默认插槽)
就是没有设置 name 属性的插槽。
html
<slot>这是个匿名插槽(没有name属性),这串字符是匿名插槽的默认值。</slot>1)可以放置在组件的任意位置。 2)一个组件中只能有一个匿名插槽。 3)匿名插槽只能作为没有 slot 属性的元素的插槽。
html
<div class="child">
  <h1>子组件</h1>
  <slot name="head">头部默认值</slot>
  <slot name="body">主体默认值</slot>
  <slot>这是个匿名插槽(没有name属性),这串字符是匿名插槽的默认值。</slot>
</div>html
<div class="parent">
  <h1>父组件</h1>
  <child>
    <p slot="body">我是主体</p>
    <p>我是其他内容</p>
    <p slot="footer">我是尾巴</p>
  </child>
</div>运行结果 : 父组件 子组件 头部默认值 (具名插槽<slot name="head">的默认值被渲染,因为父组件没有为此插槽提供内容) 我是主体 (具名插槽<slot name="body">的默认值被覆盖) 我是其他内容 (匿名插槽的默认值被覆盖)
注意:
1、<p slot="footer">我是尾巴</p> 插槽被丢弃了,因为子组件中没有<slot name="footer">的插槽与之匹配。 2、 如果子组件中的匿名插槽不存在,则<p>我是其他内容</p>也会被丢弃。
这个例子就是想说明两点:
1、坑会一直在,但是没有找到坑的萝卜就会被丢弃!2、后来者居上,后面的萝卜会覆盖原来坑里的萝卜
(2)具名插槽
意思就是具有名字的插槽,名字通过属性name来定义。
html
<slot name="body">这是个具名插槽(有name属性),这串字符是具名插槽的默认值。</slot>一个组件中可以有很多具名插槽,出现在不同的位置。
html
<!-- <base-layout>组件-->
<div class="container">
  <header>
    <slot name="header"></slot>
  </header>
  <main>
    <slot></slot>
    <!-- 一个不带 name 的 <slot> 出口会带有隐含的名字“default”。-->
  </main>
  <footer>
    <slot name="footer"></slot>
  </footer>
</div>除了上面那个例子中,把slot直接用在普通标签或者<template>上,更推荐在 <template>元素上使用 v-slot 指令,并以 v-slot 的参数的形式提供插槽名称,这样就可以定义插槽的内容了:
html
<base-layout>
  <template v-slot:header>
    <h1>我是头header</h1>
  </template>

  <p>我是main的内容111</p>
  <p>我也是main的内容222</p>

  <template v-slot:footer>
    <p>我是footer</p>
  </template>
</base-layout>1、带有 v-slot 的<template> 元素中的所有内容都将会被传入相应的插槽。
2、任何没有被包裹在带有 v-slot 的 <template> 中的内容都会被视为默认插槽的内容。
如果你希望更明确一些,可以在一个 <template> 中包裹默认插槽的内容:
html
<base-layout>
  <template v-slot:header>
    <h1>我是头header</h1>
  </template>

  <template v-slot:default>
    <p>我是main的内容111</p>
    <p>我也是main的内容222</p>
  </template>

  <template v-slot:footer>
    <p>我是footer</p>
  </template>
</base-layout>以上两种写法的渲染效果是一样的:
v-slot 只能添加在<template> 上。 (只有一种例外情况),请继续往下看。(3)作用域插槽
上面 props 的例子,可以看到 父组件传给子组件了一个属性和一个方法,子组件可以使用 props 中的属性和方法。那对于插槽来说,父组件想访问子组件的数据,又该怎么做呢?
html
<!-- 这是子组件<Child> -->
<template>
<div>
<h1>hey,我是组件Child的标题</h1>
<slot></slot>
</div>
</template>
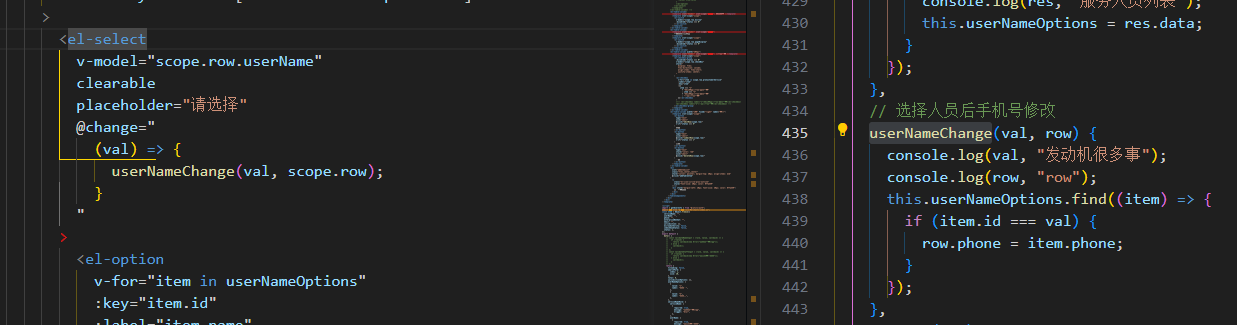
<script>
export default {
data() {
return {
childUser: { Name:"Tom", Age: 23 }
}
}
</script>当 Father 使用 Child 组件时,想访问 Child 中的数据 childUser 并且将其展示在插槽的位置:
html
<!-- 这是父组件<Father>-->
<div>
  <h1>hey,我是父组件Father的标题</h1>
  <Child>{{childUser.Name}}</Child>
</div>然而上述代码不会正常工作,因为
父级模板里的所有内容都是在父级作用域中编译的;子级模板里的所有内容都是在子作用域中编译的。
只有 <Child> 组件可以访问到 childUser,而我们提供的内容【childUser.Name、childUser.Age】是在父级<Father> 中渲染的。
为了让 childUser 在父级的插槽内容中可用,需要把 childUser 从 <Child>子级作用域传递到 <Father>父级作用域。
做法就是将 childUser 作为 <slot> 元素的一个属性绑定上去:
html
<!-- <Child> 组件: -->
<template>
  <div>
    <h1>hey,我是组件Child的标题</h1>
    <slot v-bind:childData="childUser"></slot>
  </div>
</template>
<script>
  export default {
    data() {
       return {
          childUser: { Name:"Tom", Age:23 }
      }
  }
</script>绑定在 <slot> 元素上的属性 childData 被称为插槽 prop。
现在,在父级作用域中,我们可以使用带值的 v-slot 来定义 插槽 prop 的名字:
html
<!-- 这是父组件<Father>-->
<div>
  <h1>hey,我是父组件Father的标题</h1>
  <Child>
    <template v-slot:default="slotProps">
      {{ slotProps.childData.Name}} {{ slotProps.childData.Age}}
    </template>
  </Child>
</div>在这个例子中,我们将[ 包含所有插槽 prop 的对象 ] 命名为 slotProps(自定义)。
因为在上述情况下(),被提供的内容只有默认插槽,组件的标签可以被当作插槽的模板来使用。这样我们就可以把 v-slot 直接用在组件上:
html
<!-- 这是父组件哦-->
<div>
  <h1>hey,我是父组件Father的标题</h1>
  <Child v-slot:default="slotProps">
    {{ slotProps.childData.Name}} {{ slotProps.childData.Age}}
  </Child>
</div>还可以省略 default。就像未指明的内容对应默认插槽一样,不带参数的 v-slot 被假定对应默认插槽:
html
<!-- 这是父组件哦-->
<div>
  <h1>hey,我是父组件Father的标题</h1>
  <Child v-slot="slotProps">{{ slotProps.childData.Name }} {{ slotProps.childData.Age}}</Child>
</div>但是默认插槽的缩写语法不能和具名插槽混用,因为它会导致作用域不明确:
html
<!-- 无效,会导致警告 -->
<Child v-slot="slotProps">
  {{ slotProps.childData.Name }}
  <template v-slot:other="otherSlotProps">slotProps is NOT available here</template>
</Child>只要出现多个插槽,请始终为所有的插槽使用完整的基于 <template> 的语法:
html
<!-- 这是子组件 -->
<template>
  <div>
    <h1>hey,我是组件Child的标题</h1>
    <slot v-bind:childData="childUser"></slot>
    <!--匿名插槽-->
    <slot name="other" v-bind:otherChildData="otherChildUser"></slot>
    <!--具名插槽-->
  </div>
</template>
<script>
  export default {
    data() {
       return{
          childUser: {Name:"Tom",Age:23},
          otherChildUser:{Name:"Tom",Age:23}
      }
  }
</script>html
<!-- 这是父组件-->
<Child>
  <template v-slot:default="slotProps">{{ slotProps.childData.Name }}</template>

  <template v-slot:other="otherSlotProps">{{otherSlotProps.otherChildData.Name}}</template>
</Child>将 childUser 作为 <slot> 元素的一个属性绑定上去,除了上述第一种写法,在实践中发现还可以省略 v-bind: 后面的参数: [图片上传失败...(image-d4115-1652236435855)]
html
<div>
  <h1>hey,我是组件Son的标题</h1>
  <slot v-bind="childUser"></slot>
</div>html
<div>
  <h1>hey,我是父组件Father的标题</h1>
  <Son>
    <template v-slot:default="user">{{ user.Name}}, {{ user.Age}}</template>
  </Son>
</div>(4)解构插槽 Prop
作用域插槽的内部工作原理是将你的插槽内容包裹在一个拥有单个参数的函数里,
所以,这意味着 v-slot 的值实际上可以是任何能够作为函数定义中的参数的 JavaScript 表达式。
html
<!-- <Child> 组件: -->
<template>
  <div>
    <h1>hey,我是组件Child的标题</h1>
    <slot v-bind:childData="childUser"></slot>
  </div>
</template>
<script>
  export default {
    data() {
       return {
          childUser: { Name:"Tom", Age:23 }
      }
  }
</script>html
<!-- <Father> 组件: -->
<Child v-slot="{childData}">{{ childData.Name }}</Child>将 childData 重命名为 person:
html
<!-- <Father> 组件: -->
<Child v-slot="{ childData: person }">{{ person.Name }}</Child>你甚至可以定义默认内容,用于插槽 prop 是 undefined 的情形:
html
<!-- <Father> 组件: -->
<Child v-slot="{ childData= { Name: 'Guest' } }">{{ childData.Name }}</Child>对象的解构赋值看不明呗的请移步 ====>> 变量的解构赋值—ES6 入门,第六节。
4、v-slot、slot-scope 和 slot
slot 和 slot-scope 已经被废弃,所有的 2.x 版本中 slot 和 slot-scope 属性仍会被支持,但已经被官方废弃且不会出现在 Vue 3 中。
所以更推荐使用 vue2.6.0 中的 v-slot。
(1)v-slot 的使用
1、在一个 <template>元素上使用 v-slot 指令,并以 v-slot 的参数的形式提供其名称。
html
<template v-slot:header>
  <h1>Here might be a page title</h1>
</template>2、只有下面这一种情况:当被提供的内容只有默认插槽时,组件的标签才可以被当作插槽的模板来使用。 这样我们就可以把 v-slot 直接用在组件标签上。除此之外,v-slot 必须用在 <template>元素上。
html
<!-- 这是父组件哦-->
<div>
  <h1>hey,我是父组件Father的标题</h1>
  <Child v-slot:default="slotProps">
    {{ slotProps.childData.Name}} {{ slotProps.childData.Age}}
  </Child>
</div>3、跟 v-on 和 v-bind 一样,v-slot 也有缩写,即把 v-slot: 替换为字符 #。
例如 v-slot:header 可以被重写为 #header,和其它指令一样,该缩写只在其有参数的时候才可用。
html
<template #header>
  <h1>Here might be a page title</h1>
</template>也就是说,如果你希望使用缩写的话,你必须始终以明确插槽名取而代之,default 不可以省略:
html
<Child #default="{childData}">{{ childData.Name }}</Child>或者使用不带参数的 v-slot :
html
<Child v-slot="{childData}">{{ childData.Name }}</Child>(2)slot & slot-scope 的使用
html
<template>
  <div>
    <h1>这里是子组件</h1>
    <slot name="mySlot" v-bind:user="childUser"></slot>
  </div>
</template>
<script>
  export default {
    name: 'Son',
    data() {
      return {
        childUser: { Name: 'Tom', Age: 23 },
      }
    },
  }
</script>html
<div>
  <h1>hey,我是父组件Father的标题</h1>
  <Son>
    <div slot="mySlot" slot-scope="data">{{ data.user.Name }} {{ data.user.Age }}</div>
  </Son>
</div>1、 slot="default" 可以省略不写,slot 可以用在 <template>元素,也可以用在任意的普通元素上。
2、这里的 slot-scope 声明了被接收的 prop 对象会作为 slotProps 变量存在于 <template> 作用域中。你可以像命名 JavaScript函数参数一样随意命名 slotProps。同样的,slot-scope可以用在 template元素,也可以用在任意的普通元素上。
手机号验证(直接 copy)
js
 phone: [

          { required: true, message: "请输入联系电话", trigger: "blur" },
          { min: 11, max: 11, message: "请输入11位手机号码", trigger: "blur" },
          {
            pattern: /^(13[0-9]|14[01456879]|15[0-3,5-9]|16[2567]|17[01235678]|18[0-9]|19[012356789])\d{8}$/,
            message: "请输入正确的手机号码"
          },
          {
            validator: (rule, value, callback) => {
              if (!validMobile(value)) {
                callback(new Error("请输入正确的手机号"));
              }
            },
            message: "请输入正确的手机号码"
          }
],这是方法
js
/* 手机号码 */
export function validatePhone(rule, value, callback) {
  if (value !== '' && value !== null) {
    const isPhone = /^1\d{10}$/
    const isMob = /^(0\d{2,3}-)?([2-9]\d{6,7})+(-\d{1,6})?$/ // 座机格式  区号之后用'-'隔开
    if (!isPhone.test(value) && !isMob.test(value)) {
      callback(new Error('请输入正确的手机号'))
    } else {
      callback()
    }
  } else {
    callback(new Error('请输入手机号'))
  }
} // 仅支持1-20座机方法
js
/* 座机 */
export function validateGPhone(rule, value, callback) {
  if (value !== '' && value !== null) {
    const isMob = /^(0\d{2,3}-)?([2-9]\d{6,7})+(-\d{1,6})?$/ // 座机格式  区号之后用'-'隔开
    if (!isMob.test(value)) {
      callback(new Error('请输入正确的号码'))
    } else {
      callback()
    }
  } else {
    callback()
  }
} // 仅支持1-20js
const colors = ['#5470C6', '#68bbc4', '#77bd81']
option = {
  color: colors,
  tooltip: {
    trigger: 'axis',
    axisPointer: { type: 'cross' },
  },
  toolbox: {
    feature: {
      dataView: { show: true, readOnly: false },
      magicType: { show: true, type: ['line', 'bar'] },
      restore: { show: true },
      saveAsImage: { show: true },
    },
  },
  legend: {
    data: ['巡店视频(个)', '视频大小(GB)', '视频时长(分钟)'],
  },
  xAxis: [
    {
      type: 'category',
      data: ['贵阳市', '遵义市', '六盘水市', '安顺市', '毕节市', '铜仁市'],
    },
  ],
  yAxis: [
    {
      type: 'value',
      name: '',
      min: 0,
      max: 250,
      interval: 50,
      axisLabel: {
        formatter: '{value} ',
      },
    },
    {
      type: 'value',
      name: '',
      min: 0,
      max: 250,
      interval: 50,
      axisLabel: {
        formatter: '{value}',
      },
    },
  ],
  series: [
    {
      name: '巡店视频(个)',
      type: 'bar',
      label: {
        normal: {
          show: true,
          position: 'top',
        },
      },
      data: [2.0, 4.9, 7.0, 23.2, 25.6, 76.7],
    },
    {
      name: '视频大小(GB)',
      type: 'bar',
      label: {
        normal: {
          show: true,
          position: 'top',
        },
      },
      data: [2.6, 5.9, 9.0, 26.4, 28.7, 70.7],
    },
    {
      name: '视频时长(分钟)',
      type: 'line',
      yAxisIndex: 1,
      label: {
        normal: {
          show: true,
          position: 'top',
        },
      },
      data: [2.0, 2.2, 3.3, 4.5, 6.3, 10.2],
    },
  ],
}js 的 find()
js
this.dataItem.find((item) => item.longitude === longitude && item.latitude === latitude).name
js
例如
checkedCities.find((finditem) => {
  return finditem.id === item.id
})地图

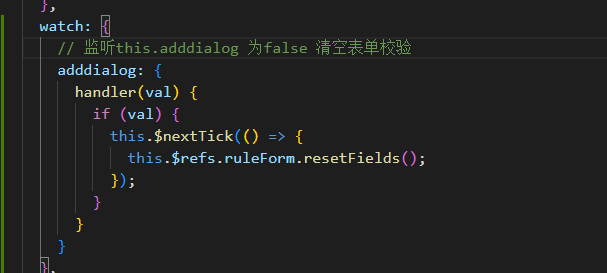
validate
js
 adddialog: {
      handler(val) {
        if (val) {
          this.$nextTick(() => {
            this.$refs.ruleForm.resetFields();
          });
        }
      }
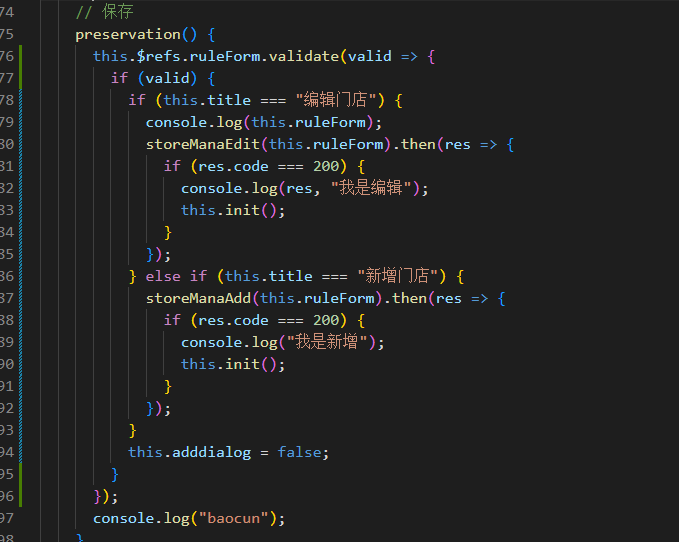
js
 preservation() {
      this.$refs.ruleForm.validate(valid => {
        if (valid) {
          if (this.title === "编辑门店") {
            console.log(this.ruleForm);
            storeManaEdit(this.ruleForm).then(res => {
              if (res.code === 200) {
                console.log(res, "我是编辑");
                this.init();
              }
            });
          } else if (this.title === "新增门店") {
            storeManaAdd(this.ruleForm).then(res => {
              if (res.code === 200) {
                console.log("我是新增");
                this.init();
              }
            });
          }
          this.adddialog = false;
        }
      });
      console.log("baocun");
    },
树
js
<el-aside>
            <div class="code">组织结构</div>
            <div class="add-button">
              <el-button type="primary" plain @click="addManagement">
                新增顶级组织
              </el-button>
            </div>
            <el-tree
              :data="data"
              node-key="id"
              :expand-on-click-node="false"
              @node-click="treeClick"
              :props="defaultProps"
            >
              <span class="custom-tree-node" slot-scope="{ node, data }">
                <span>{{ data.name }}</span>
                <span>
                  <el-button
                    type="text"
                    size="mini"
                    @click.stop="() => append(data)"
                  >
                    新增
                  </el-button>
                  <el-button
                    type="text"
                    size="mini"
                    @click.stop="() => edit(data)"
                  >
                    编辑
                  </el-button>
                  <el-button
                    type="text"
                    size="mini"
                    style="color: rgb(245, 108, 108)"
                    @click.stop="() => remove(data)"
                  >
                    删除
                  </el-button>
                </span>
              </span>
            </el-tree>
          </el-aside>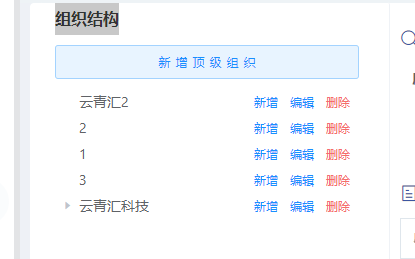
git 仓库操作
Git 全局设置
git config --global user.name "廖 心怡"
git config --global user.email "1169326043@qq.com"创建一个新仓库
git clone http://git.ngrok.51meets.com/loading-installation-platform/load-install-front.git
cd load-install-front
git switch -c dev
touch README.md
git add README.md
git commit -m "add README"
git push -u origin dev推送现有文件夹
cd existing_folder
git init --initial-branch=dev
git remote add origin http://git.ngrok.51meets.com/loading-installation-platform/load-install-front.git
git add .
git commit -m "Initial commit"
git push -u origin dev推送现有的 Git 仓库
cd existing_repo
git remote rename origin old-origin
git remote add origin http://git.ngrok.51meets.com/loading-installation-platform/load-install-front.git
git push -u origin --all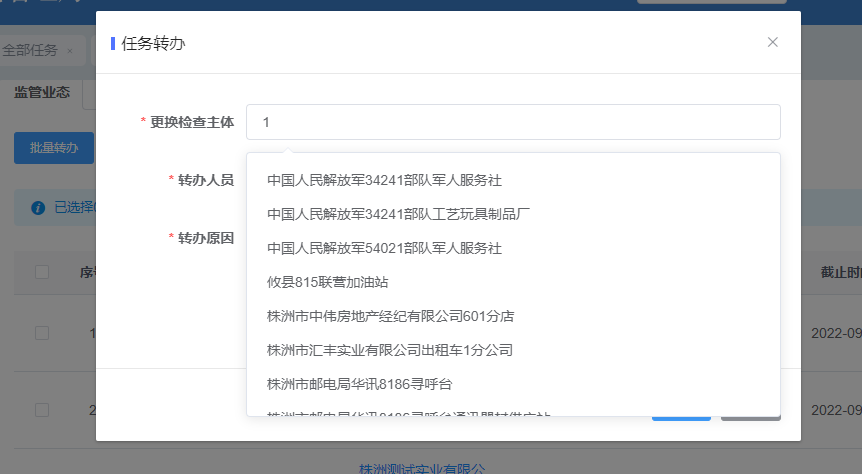
git push -u origin --tags搜索下拉框
js
 <el-form-item label="更换检查主体" prop="enterpriseName">
              <el-autocomplete
               :trigger-on-focus="false"
                clearable
                class="inline-input"
                v-model="form.enterpriseName"
                :fetch-suggestions="querySearch"
                placeholder="请输入检索词"
                @select="handleSelect"
                @clear="setBlur()"
              ></el-autocomplete>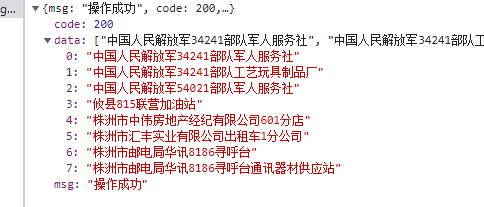
</el-form-item>js
 querySearch(queryString, cb) {
      let nullData = []
      console.log(queryString);
      getEnterPriseName({ enterpriseName: queryString }).then(res => {
        if (res.data.length > 0) {
          cb(
            res.data.map(item => {
              return {
                value: item
              };
            })
          );
        }else {
          nullData.push({value:'暂无数据'})
          cb(nullData)
        }
      });
    },

     // 用与绑定选中数据触发发的函数
    handleSelect(item) {
      console.log("选中了这条记录:", item.value);
    },

        // 解决当自动清空时 不聚焦 内容不出来的问题
    setBlur() {
      console.log(document.activeElement.blur(),'document.activeElement.blur()')
	document.activeElement.blur()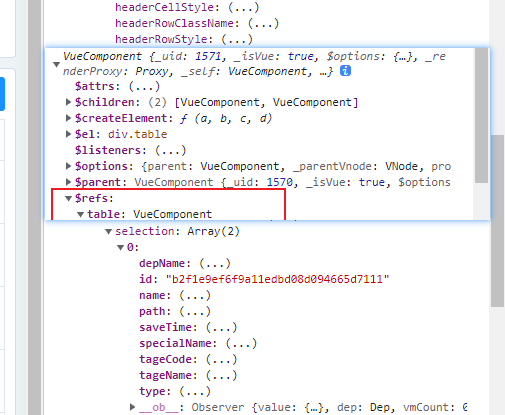
},批量删除
js
<el-button type="primary" @click="multiDelete"
                >批量删除</el-button


 multiDelete() {
      let select = this.$refs.table.$refs.table.selection;//获取table表格哪一行的数据
      console.log(select,'select');
      console.log(this.$refs.table,'this.$refs.table');
      if (select) {
        let ids = select.map((item) => item.id);
        if (ids.length > 0) {
          this.$confirm("此操作将永久批量删除, 是否继续?", "提示", {
            confirmButtonText: "确定",
            cancelButtonText: "取消",
            type: "warning",
            closeOnClickModal: false, //是否可以点击空白处关闭弹窗
          }).then((confirm, cancel) => {
            api.TableListItemsDelete({ ids }).then((res) => {
              if (res.code === 200) {
                this.$message.success("批量删除成功");
                this.init();
              }
            });
          });
        } else {
          this.$message.warning("请选择需要删除的列表项!");
        }
      }
    },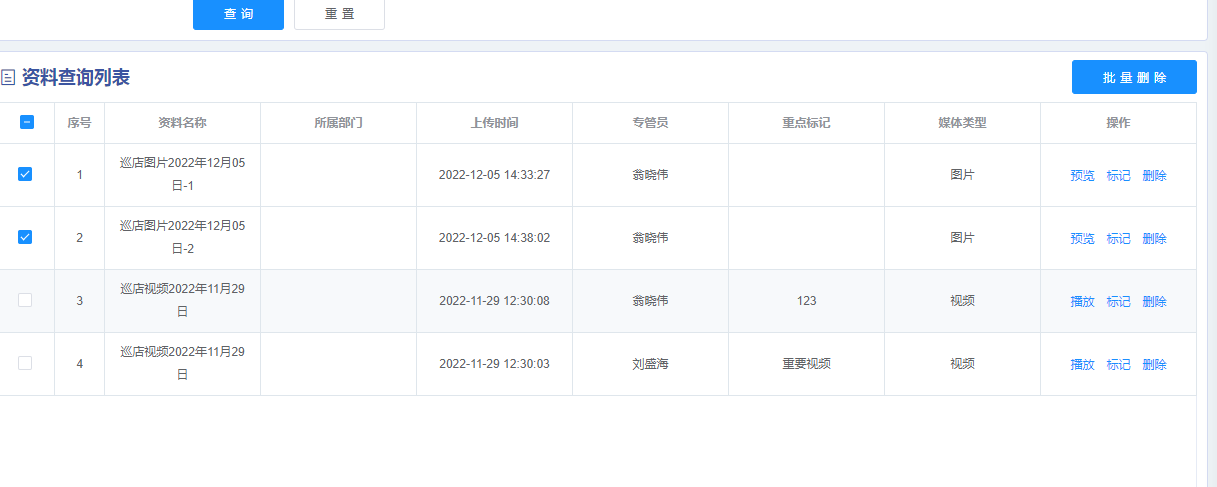
打印的结果:

重置表单
js
this.searchForm = this.$options.data().searchForm
sessionStorage 传值
sessionStorage 是浏览器的全局对象,存在它里面的数据会在页面关闭时清除 。运用这个特性,我们可以在所有页面共享一份数据。
导出

js
<el-button type="primary" @click="exportFile">导出</el-button>js
exportFile() {
console.log(this.searchForm);
var imgUrl =
process.env.VUE_APP_BASE_API +
`/statistic/propaganda-valid/export?index=${
this.searchForm.index ? this.searchForm.index : ""
}&size=${this.searchForm.size ? this.searchForm.size : ""}&governCode=${
this.searchForm.governCode ? this.searchForm.governCode : ""
}®ionCode=${
this.searchForm.regionCode ? this.searchForm.regionCode : ""
}&shopName=${
this.searchForm.shopName ? this.searchForm.shopName : ""
}&shopNumber=${
this.searchForm.shopNumber ? this.searchForm.shopNumber : ""
}`;
var link = document.createElement("a");
fetch(imgUrl, {
headers: {
Authorization:
"Bearer " + sessionStorage.getItem("template_access_token")
},
responseType: "blob", // 设置接收格式为blob格式
method: "POST"
})
.then(res => res.blob())
.then(blob => {
if (blob.type === "application/json") {
throw new Error("isJson");
}
link.href = URL.createObjectURL(blob);
link.download = "宣传品有效期统计.xls";
document.body.appendChild(link);
link.click();
})
.catch(e => {
console.log(e, "导出失败");
this.$message.error("导出失败!");
});
},下载
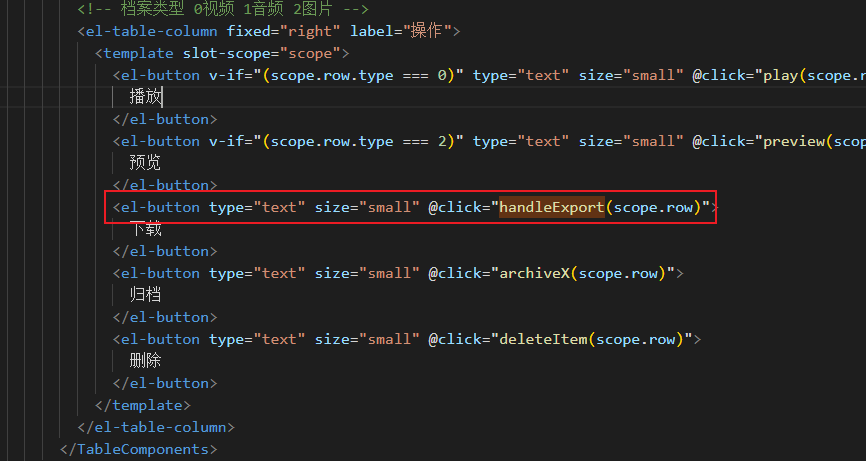
js
 <el-button type="text" size="small" @click="handleExport(scope.row)">
                下载
</el-button>js
 handleExport(row) {
      // 文件下载的方法
      var imgUrl = process.env.VUE_APP_BASE_API + '/sys/file/download?path=' + row.path;
      var link = document.createElement('a')
      fetch(imgUrl,{
        headers:{
          Authorization: 'Bearer ' + sessionStorage.getItem('template_access_token')
        },
        responseType: 'blob' // 设置接收格式为blob格式
      }).then((res) => res.blob()).then((blob) => {
        if (blob.type === 'application/json') {
          throw new Error('isJson')
        }
        link.href = URL.createObjectURL(blob)
        link.download = row.name
        document.body.appendChild(link)
        link.click()
      }).catch(e=>{
        console.error(e);
        this.$message.error("下载失败!")
      })
},js
路径拼接 传body参数时
 fetch('http://localhost:3000/books', {
      method: 'post',
      body: JSON.stringify({ //这是传body参数时 不是params
        uname: '张三',
        pwd: '456'
      }),
      headers: {
        'Content-Type': 'application/json'
      }
})js
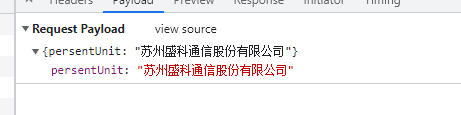
下载
handleExport() {
      var imgUrl =
          process.env.VUE_APP_BASE_URL +
          'admin/file/export/approval/declarationSummaryForm'
      var link = document.createElement('a')
      fetch(imgUrl, {
        headers: {
          Authorization: 'Bearer ' + this.$store.getters.token.token,
          'Content-Type': 'application/json'//json格式这个一定要加
        },
        method: 'POST',
        body: JSON.stringify({
            //传参
          keyWord: this.searchParameters.keyWord,
          persentUnit: this.$store.getters.user.entName,
          year: this.searchParameters.year,
          industry: this.searchParameters.industry
        }),
        responseType: 'blob' // 设置接收格式为blob格式
      })
        .then(res => res.blob())
        .then(blob => {
          if (blob.type === 'application/json') {
            throw new Error('isJson')
          }
          link.href = URL.createObjectURL(blob)
          link.download = '专业技术职务任职资格申报人员汇总表.xls'
          document.body.appendChild(link)
          link.click()
        })
        .catch(e => {
          console.error(e)
          this.$message.error('下载失败!')
        })
    },
js
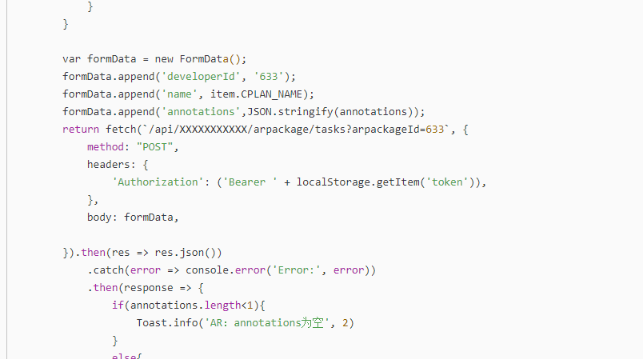
formaDtata传参
var formData = new FormData()
formData.append('developerId', '633')
formData.append('name', item.CPLAN_NAME)
formData.append('annotations', JSON.stringify(annotations))
return fetch(`/api/XXXXXXXXXXX/arpackage/tasks?arpackageId=633`, {
  method: 'POST',
  headers: {
    Authorization: 'Bearer ' + localStorage.getItem('token'),
  },
  body: formData,
})
  .then((res) => res.json())
  .catch((error) => console.error('Error:', error))
  .then((response) => {
    if (annotations.length < 1) {
      Toast.info('AR:annotations为空', 2)
    } else {
      console.log('Success:', response)
      Toast.info('AR成功调用', 2)
    }
  })
预览
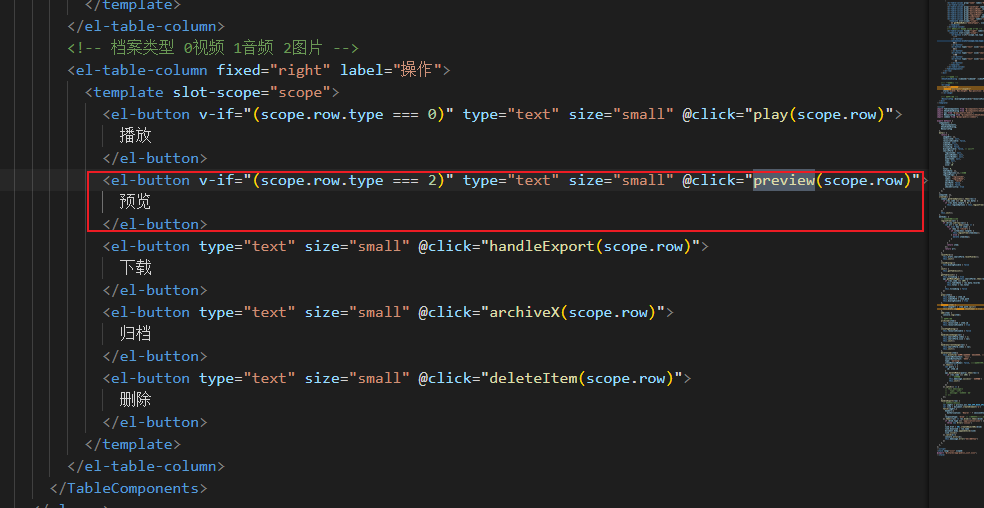
js
  <el-button v-if="(scope.row.type === 2)" type="text" size="small" @click="preview(scope.row)">
                预览
  </el-button>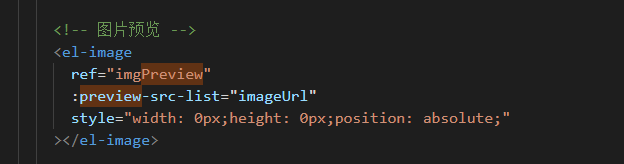
js
 <el-image
      ref="imgPreview"
      :preview-src-list="imageUrl"
      style="width: 0px;height: 0px;position: absolute;"
    ></el-image>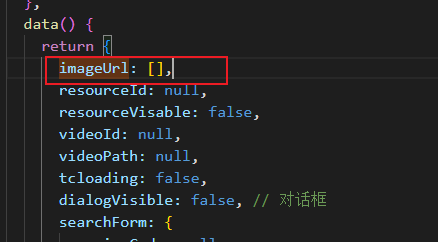
js
imageUrl: [],
js
preview(item) {
      this.imageUrl = item.path.split()
      this.$refs.imgPreview.showViewer = true //那到组件的内部 然后通过showView来展示图片
},formdata 请求传参
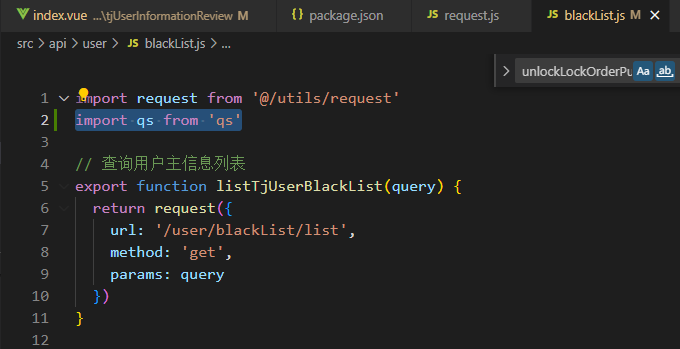
js
import qs from 'qs'js
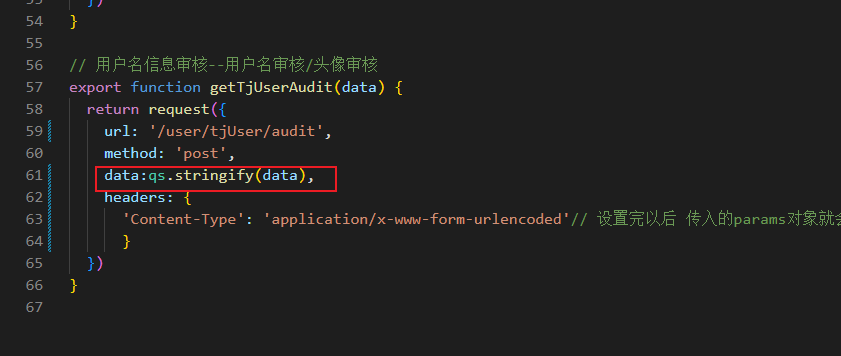
export function getTjUserAudit(data) {
  return request({
    url: '/user/tjUser/audit',
    method: 'post',
    data: qs.stringify(data),
    headers: {
      'Content-Type': 'application/x-www-form-urlencoded', // 设置完以后 传入的params对象就会时候用formdata传参的方式
    },
  })
}
然后接口该怎么写就怎么写
判断对象{}有无
js
Object.keys(val).length > 0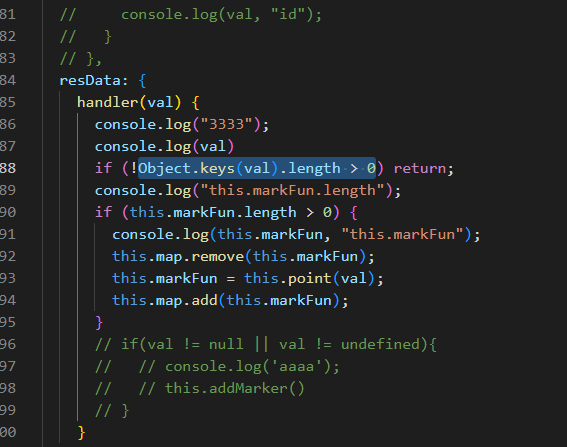
this.a?.b?.c
这样 如果 a 是 undefined 控制台就不会报错了
导出 全局挂载(main.js)
js
main.js
// 文件post导出下载
Vue.prototype.pullFile = (url, data, fileName) => {
  httpPostBlob({
    url,
    data
  }).then(blob => {
    if (blob.type === 'application/json') {
      throw new Error('data is not file: json')
    }
    var link = document.createElement('a')
    link.href = URL.createObjectURL(blob)
    link.download = fileName
    document.body.appendChild(link)
    link.click()
  })
}

页面实例(用法)
   // 导出
    exportExcel(){
      this.pullFile("/device/export", this.searchForm, "设备管理列表.xlsx")
},AI 搜索
CodeGeeX 插件
日期格式化方法
js
vue 在utils/ruoyi.js文件下写方法

export function parseTime(time, pattern) {
	console.log(time,'11',pattern,'pattern')

	if (arguments.length === 0 || !time) {
		return null
	}
	const format = pattern || '{y}-{m}-{d} {h}:{i}:{s}'
	let date
	if (typeof time === 'object') {
		date = time
	} else {
		if ((typeof time === 'string') && (/^[0-9]+$/.test(time))) {
			time = parseInt(time)
		} else if (typeof time === 'string') {
			time = time.replace(new RegExp(/-/gm), '/');
		}
		if ((typeof time === 'number') && (time.toString().length === 10)) {
			time = time * 1000
		}
		date = new Date(time)
	}
	const formatObj = {
		y: date.getFullYear(),
		m: date.getMonth() + 1,
		d: date.getDate(),
		h: date.getHours(),
		i: date.getMinutes(),
		s: date.getSeconds(),
		a: date.getDay()
	}
	const time_str = format.replace(/{(y|m|d|h|i|s|a)+}/g, (result, key) => {
		let value = formatObj[key]
		// Note: getDay() returns 0 on Sunday
		if (key === 'a') { return ['日', '一', '二', '三', '四', '五', '六'][value] }
		if (result.length > 0 && value < 10) {
			value = '0' + value
		}
		return value || 0
	})
	return time_str
}js
在main.js导入utils / ruoyi.js
import {
  parseTime, //都是写在utils/ruoyiu.js里面的方法
  resetForm,
  addDateRange,
  selectDictLabel,
  selectDictLabels,
  download,
  handleTree,
  pick,
} from '@/utils/ruoyi'

// 全局方法挂载
Vue.prototype.parseTime = parseTime
渐变阴影
js
background: linear-gradient(90deg, #c0dfcd, #c4e4cf, #cbebd1, #dcf1d7, #e4f0d9);
height: calc(100% - 54px);
for 循环背景颜色
js
:style="{ background: `linear-gradient(to right, ${colors[index][0]}, ${colors[index][1]})`, color: '#fff' }"

data:
		colors: [
        ['#FF4F38', '#FF9587'],
        ['#FF9638', '#FFC18A'],
        ['#3C89FE', '#87CCF8'],
        ['#7FFF00', '#32CD32'],
        ['#FF1493', '#C71585']
]\h5 保存图片
js
<u-button class="btn_but" text="保存图片" @tap="savePic"></u-button>js
savePic(Url){
					Url = this.posterUrl
					var triggerEvent = "touchstart";
				    var blob=new Blob([''], {type:'application/octet-stream'});
				    var url = URL.createObjectURL(blob);
				    var a = document.createElement('a');
				    a.href = Url;
				    a.download = Url.replace(/(.*\/)*([^.]+.*)/ig,"$2").split("?")[0];
					var e = new MouseEvent('click', ( true, false, window, 0, 0, 0, 0, 0, false, false, false, false, 0, null));
				    a.dispatchEvent(e);
				    URL.revokeObjectURL(url);

},css

js
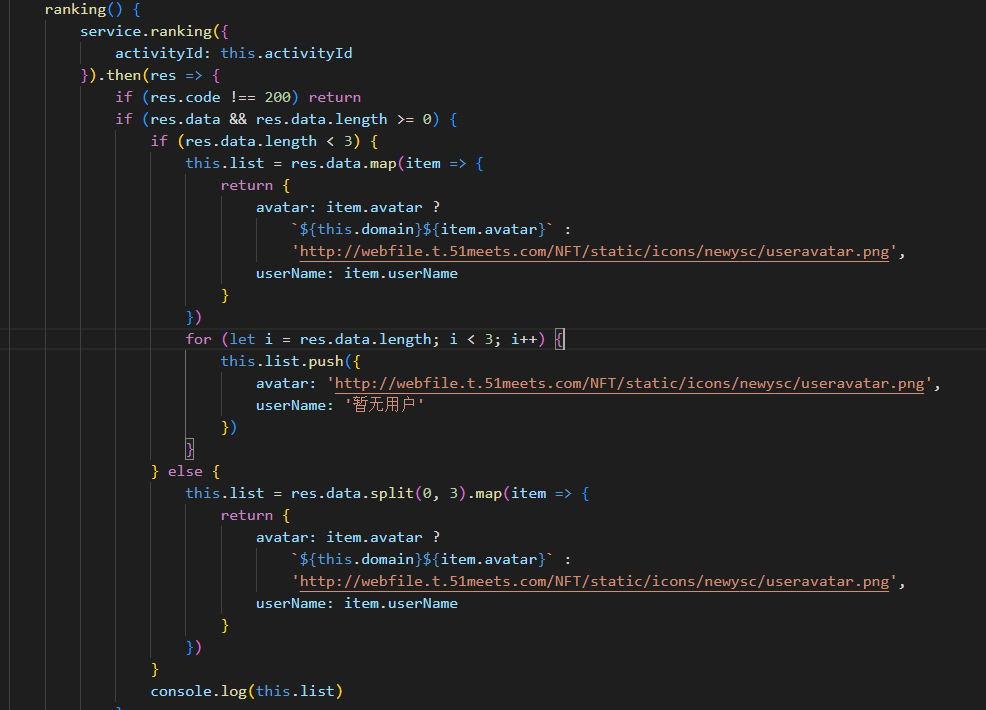
:class["productPicture",showImg ? 'active' : ''] //productPicture这是原有的样式 如果有showImg 就也采用active这个样式 否则不采用排名
当后端返回只有 1 条数据是时 渲染上去 并且剩下两个为默认值

使用 rem,calc() 函数能够用来创建一个基于视口的栅格。我们可以设置根元素的字体大小为视口宽度的一部分。
js
font-size: calc(100vw / 30);获取上传后缀名.后面的名字
js
file.name.substring(file.name.lastIndexOf('.'))chatGpt 获取 key 接口https://api.aigcfun.com/fc/key
js
https://api.aigcfun.com/fc/keyhttps://chat2.xeasy.me/ https://chat3.xeasy.me/
当状态为启用时为绿色 为禁用时为红色
js
<el-table-column
              prop="status"
              label="菜单状态"
              align="center"
              width="100"
            >
              <template slot-scope="{ row }">
                <span :class="{ 'dot': true, 'green': row.status === 1, 'red': row.status === 0}"></span>
                 {{ row.status | handleStatus }}
              </template>
            </el-table-column>

:class="{ 'dot': true, 'green': row.status === 1, 'red': row.status === 0}"


css
.dot {
  display: inline-block;
  width: 10px;
  height: 10px;
  border-radius: 50%;
  margin-right: 5px;
}

.green {
  background-color: #67c23a;
}

.red {
  background-color: #f56c6c;
}重置表单
js
1:加上ref="ruleFormRef"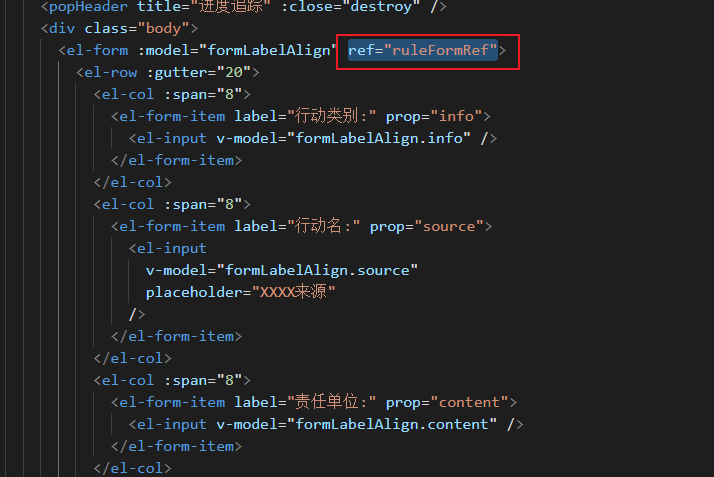
js
2:按钮重置
<el-form-item>
          <el-button type="primary" @click="reset(ruleFormRef)">重置</el-button>
          <el-button type="primary" @click="consult">查询</el-button>
</el-form-item>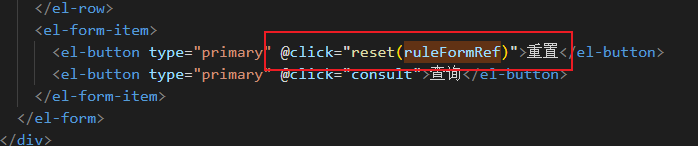
js
const ruleFormRef = ref(null)
const reset = (ruleFormRef) => {
  ruleFormRef.resetFields()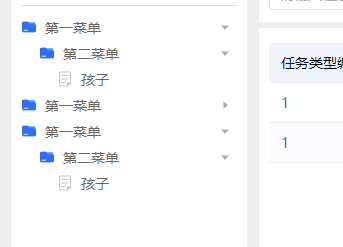
}tree 修改一级目录和子节点样式
js
// 修改tree一级目录样式
/deep/ .el-tree>.el-tree-node> .el-tree-node__content {
  font-size: 20px;
  font-weight: 900;
  color:#2a2a2a;
}
// 修改子节点目录样式
/deep/ .el-tree-node__content {
  margin-top: 10px;
  height: 40px;
  font-size: 15px;
  font-weight: 700;
  &:hover {
    background-color:#f2f4ff !important;
    color: #3956f2;
    ;
  }
}js
 // 修改子节点目录样式
  .el-tree-node__content {
    font-size: @font14;
    color: #666666;
    width: 100%;
    .el-tree-node__label {
    padding-left: 24px;
      background-size: 16px 16px;
      background-repeat: no-repeat;
      background-position: left;
      background-image: url(@/assets/images/main_folder.png);
    }
    &:hover {
      color: #3860f8;
    }
    &:has(.is-leaf) {
      .el-tree-node__label {
        background-image: url(@/assets/images/file.png);
      }
    }
  }
  .el-tree {
    flex: 1;
  }
  .el-tree-node:focus > .el-tree-node__content {
    color: #3860f8; //节点的字体颜色
    font-weight: bold;
  }
}

.el-tree {
  height: 100%;
  .el-tree-node__content {
    position: relative;
    font-weight: unset !important;
    > .el-tree-node__expand-icon {
      position: absolute;
      right: 0;
    }
  }
}
最近一年
js
time: [
        new Date().setTime(new Date().getTime() - 3600 * 1000 * 24 * 365),
        new Date()
        // new Date(new Date().getFullYear() + "-01-01").getTime(),
        // new Date(new Date().getFullYear() + "-01-31").getTime()
      ],
截图地址最后一个
js
baseUrl: process.env.VUE_APP_BASE_URL.replace(/\/$/, ''),
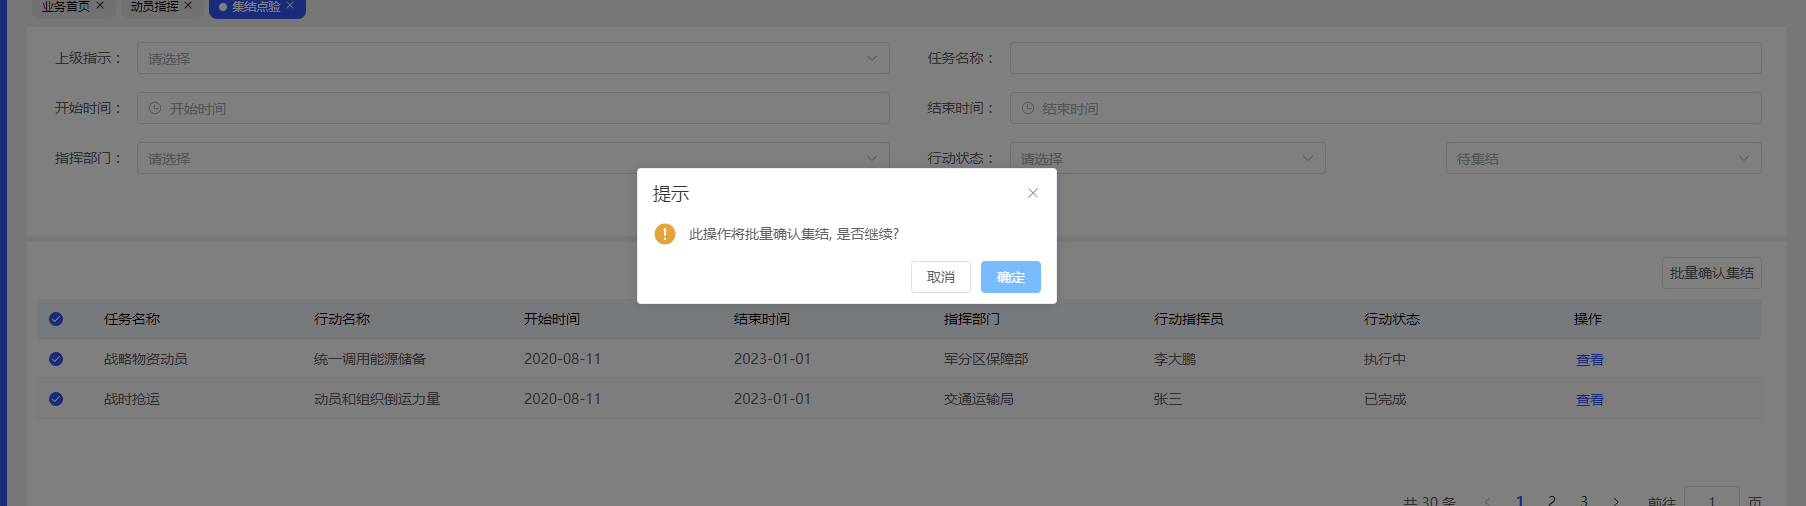
vue3 表格批量操作
js
import { ElMessage, ElMessageBox } from "element-plus";
<div class="main_btn">
        <el-button style="width: 100px" @click="batch">批量确认集结</el-button> //点击批量按钮
      </div>
      <div class="main_tab">
        <el-table
          ref="multipleTableRef"
          :data="tableData"
          stripe
          style="width: 100%"
          :row-key="getRowKeys" //必填
          @selection-change="handleSelectionChange" //必填
        >
          <el-table-column
            type="selection"
            :reserve-selection="true" //必填
            width="55"
          />
          <el-table-column prop="name" label="任务名称" />
          <el-table-column prop="actionName" label="行动名称" />
          <el-table-column prop="creaTime" label="开始时间" />
          <el-table-column prop="endTime" label="结束时间" />
          <el-table-column prop="department" label="指挥部门" />
          <el-table-column prop="commander" label="行动指挥员" />
          <el-table-column prop="state" label="行动状态" />
          <el-table-column fixed="right" label="操作" width="200px">
            <template #default>
              <el-button text link type="primary">查看</el-button>
            </template>
          </el-table-column>
        </el-table>
      </div>

方法:
const multipleTableRef = ref();
const select_order_number = ref(""); //表格select选中的条数
const select_orderId = ref([]); //表格select复选框选中的id
const multipleSelection = ref([]);
//选中的list
const getRowKeys = (row) => {
  //记录每行的key值
  return row.id;
};
//当表格选择项发生变化时会触发该事件
const handleSelectionChange = (val) => {
  console.log(val, "val");
  // 解决来回切换页面,也无法清除上次选中情况
  multipleSelection.value = val;
  console.log(multipleSelection.value, "multipleSelection.value");
  //  表格选中的条数
  select_order_number.value = multipleSelection.value.length;
  select_orderId.value = [];
  if (val) {
    undefined;
    val.forEach((row) => {
      undefined;
      if (row) {
        undefined;
        select_orderId.value.push(row.id);
      }
    });
  }
  console.log(select_orderId.value, "select_orderId.value");
};
// 批量操作
const batch = () => {
  if (select_orderId.value.length <= 0) {
    ElMessage({
      type: "success",
      message: "请选择要批量的操作项",
    });
  } else {
    ElMessageBox.confirm("此操作将批量确认集结, 是否继续?", "提示", {
      confirmButtonText: "确定",
      cancelButtonText: "取消",
      type: "warning",
    })
      .then(() => {
        ElMessage({
          type: "success",
          message: "批量操作成功!",
        });
      })
      .catch(() => {
        ElMessage({
          type: "info",
          message: "已取消批量",
        });
      });
  }
};未选择表格项时效果:

选择表格项时效果:
vue 防抖
js
import { throttle } from 'lodash'
 <button class="btn01" @click="check">查看申报类型及条件</button>

方法:
check: throttle(function() {
      if (this.radio === '') {
        console.log(this.radio, 'dio')
        this.$message({
          message: '请先勾选是否知晓评审须知',
          type: 'warning'
        })
      } else {
        console.log(this.radio)
        this.isShow = true
        this.isHide = false
        if (this.num === 2) {
          this.$router.push('/firstLoad/claimType')
        } else {
          this.num = 2
        }
      }
    }, 3000),
自定义规则校验(身份证篇)
js
idNumber: [
    { type: 'string', required: true, message: '请输入身份证号,必须是数字', trigger: 'change' },
    // { min: 18, max: 18, message: '长度 18 个字符', trigger: 'change' }
    {validator: isCardId, trigger: 'change'}
  ],
    方法:
let isCardId = (rule, value, callback) => {
  if (!value) {
    return new Error('请输入身份证号)')
  } else {
    const reg =
        /^\d{6}(18|19|20)?\d{2}(0[1-9]|1[0-2])(([0-2][1-9])|10|20|30|31)\d{3}(\d|X|x)$/
    const card = reg.test(value)
    if (!card) {
      callback(new Error('身份证号格式有误!'))
    } else {
      callback()
    }
  }
}Vue 从一个页面跳转到另一个页面指定位置
Vue 从一个页面跳转到另一个页面指定位置(跨页面锚点定位))
从 A 页面跳转到 B 页面的 boxCenter 位置
1. B 页面,在需要跳转到的指定位置添加 id 名(eg: id=‘boxCenter’)
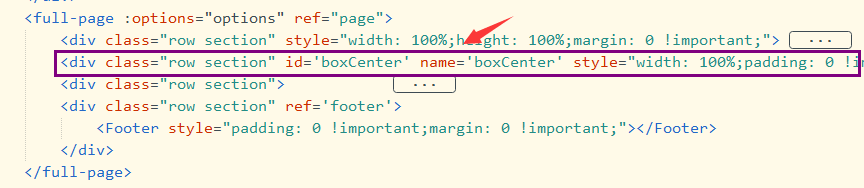
2. A 页面,添加点击方法
第一个参数为 B 页面路由地址,第二个参数为要跳转到的位置
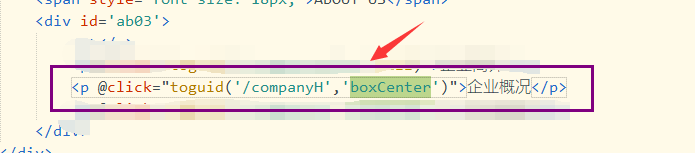
3. A 页面下 toguid 方法
js
methods:{
	toguid(path,id){
		var path=path
		var Id=id;
		localStorage.setItem('toId',Id);
		this.$router.push(path);
	}
}B 页面
js
created() {
	this.$nextTick(()=>{this.toLocal()})
},
mounted() {
	let _this=this;
	_this.$nextTick(function(){
			window.addEventListener('scroll',_this.handleScroll)
	})
},
methods: {
	toLocal(){
		//查找存储的锚点id
		let Id=localStorage.getItem('toId');
		let toElement=document.getElementById(Id);
		//锚点存在跳转
		if(Id){
			toElement.scrollIntoView()
		}
	}
}
//用完后记得将存储的锚点置空,否则会影响其他页面跳转到当前页面
destroyed() {
	localStorage.setItem('toId','');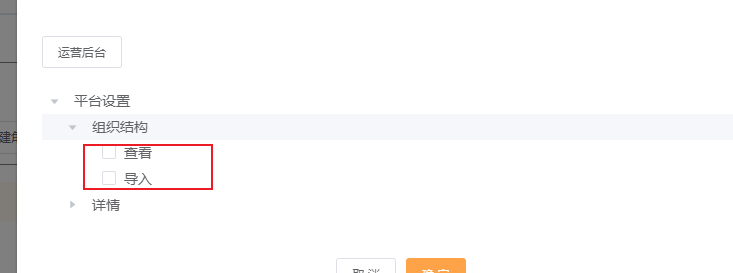
}elementui 树节点(子节点显示勾选)
js
::v-deep .el-tree .el-tree-node .is-leaf + .el-checkbox .el-checkbox__inner {
  display: inline-block;
}
::v-deep .el-tree .el-tree-node .el-checkbox .el-checkbox__inner {
  display: none;
}
方法
js
input 输入限制只能输入数字并且只能输入保留后两位小数
js
oninput="if(value.indexOf('.') > -1) { value = value.slice(0, value.indexOf('.') + 3); }" type="number"对象转换成数组对象
js
//原数据
let obj = {
  哈哈哈: '20',
  调试4000: '20',
  摄像头: '20',
  调试1300: '20',
  调试1500: '20',
}
//期望得到的数据格式
let leftData = [
  {
    name: '哈哈哈',
    value: '20',
  },
  {
    name: '调试4000',
    value: '20',
  },
]

//转换方法
let obj = {
  哈哈哈: '20',
  调试4000: '20',
  摄像头: '20',
  调试1300: '20',
  调试1500: '20',
}
let arr = []
for (let i = 0; i < Object.keys(obj).length; i++) {
  arr.push({
    name: Object.keys(obj)[i],
    value: obj[Object.keys(obj)[i]],
  })
}
console.log(arr)